Happy Trails to You
These trail listings are provided as a guide only.
wnyHorse makes no representation or guarantee as to the accuracy or safety of the trails listed here and does not endorse or give permission for the use of the trials and is not liable for any claims from riders or landowners.
To view trail maps download Acrobat Reader
Looking for a place to ride in western New York?
Here are 5 suggestions from the Buffalo News:
Double DAB Riding Stable, 5811 Welch Hill Road, Ripley Greendale Farm, 10379 Crump Road, Holland
Kelkenberg Farm, 9270 Wolcott Road, Clarence Center The Crosspatch, 5281 Baker Road, Salamanca
Wolcott Farms, 4085 Quakertown Road, Warsaw
Who to ride with?
Check our Club & Organization Directory
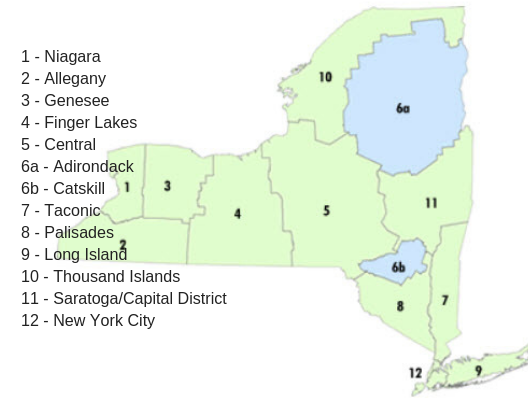
Alison Wells Ney Trail – CR2T Trail System
Allegany State Park – Quaker Area
Allegany State Park – Red House Area
Allegheny National Forest Riding Trails – PA
Brocton Area Recreational Trail
Chautauqua County Equestrian Trail System (CCETS)
Genesee Valley Greenway State Park
Karr Valley Creek State Forest
Laurie A. Baer Trail – CR2T Trail System
Little Valley Horse Park and Trails
Nadine & Paul Webb Trail – CR2T Trail System
Nancy B. Diggs Trail – CR2T Trail System
Ralph C. Sheldon Jr. Trail – CR2T Trail System
Sherman Recreational Trail – CR2T System
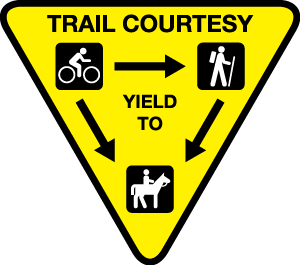
Rules of the Road Governing Horses in NYS
NYS DEC Trail Rules and Regulations
Emergency First Aid Kit
Encountering an Emergency
Camping with Horses
Happy Camper
Safety During Hunting Season: When trail riding
Trail-Riding Essentials
Heat Index
Know when you should use caution or avoid riding outdoors
“ICE” (In Case of Emergency)
Trail Riding at Night
Get Used Night Riding
Trail Safety
NYS Thruway Road Conditions
Pre-Trip Checklist
Emergencies on the Road
Trailer Maintenance
Trip Essentials
rules & regulations
Rules of the Road Governing Horses in NYS
Excerpts from Chapter 775 Title VII Rules of the Road
for full text see: http://ypdcrime.com/vt/article26.htm
1146-a. Approaching horses.
1. Notwithstanding the provisions of any other law to the contrary, every driver of a vehicle shall exercise due care to
avoid colliding with any horse being ridden or led along a public highway.
2. Every driver of a vehicle shall approach a horse being ridden or led along a public highway at a reasonable and
prudent speed so as to avoid frightening such horse and shall pass the horse at a reasonable distance.
3. No driver of a vehicle shall sound the horn when approaching or passing a horse on a public highway.
1260. Effect of regulations.
(a) The parent of any child and the guardian of any ward shall not authorize or knowingly permit such child or ward to
violate any of the provisions of this article.
b) These regulations applicable to horses shall apply whenever a horse is ridden or led upon any highway and upon
private roads open to public motor vehicles traffic.
1261. Traffic laws apply to persons riding or leading horses.
Every person riding or leading a horse upon a roadway shall be granted all rights and shall be subject to all
the duties applicable to the driver of a vehicle by this title, except as to special regulations in this article and except
as to those provisions of this title which by their nature can have no application.
1262. Riding on roadways, shoulders and horse paths.
(a) Upon all roadways, horses shall be ridden or led either near the right hand curb or edge of the roadway or
upon a usable right-hand shoulder, lane or path in such a manner as to prevent undue interference with the flow of
traffic.
(b) Persons riding or leading horses upon a roadway shall do so in single file.
(c) Any person riding or leading horses who is entering the roadway from a private road, driveway, alley or over a curb
shall bring the horse to a full stop before entering the roadway.
1263. Carrying articles.
No person riding or leading a horse shall carry any package, bundle, or article which prevents such personfrom keeping at least one hand on the reins.
1264. Ban on night riding.
No person shall ride or lead a horse upon a roadway during the period from one-half hour after sunset to one-half hour before sunrise. The provisions of this section shall not apply to horse-drawn carriages or carts or police officers, peace officers or park rangers mounted on horseback.
1265. Wearing of helmets.
1. No person less than fourteen years of age shall ride a horse unless such person is wearing a helmet meeting or exceeding ASTM F1163 (Safety Equipment Institute certified) Equestrian Standard. For purposes of this section, shall mean that the helmet & manufacturer agrees to the rules and provisions of a system that includes independent testing and quality control audits, and that each helmet manufactured by such manufacturer is permanently marked with the certifying body & registered mark or logo before such helmet is sold or offered for sale. For the purposes of this section, wearing a helmet means having a helmet fastened securely upon the head using the manufacturer & fitting guidelines for the particular model used.
2. Any person who violates the provisions of this section shall pay a civil fine not to exceed fifty dollars. A police officer shall only issue a summons for a violation of this section by a person less than fourteen years of age to the parent or guardian of such person if the violation by such person occurs in the presence of such person & parent or guardian and where such parent or guardian is eighteen years of age or more. Such summons shall only be issued to such parent or guardian, and shall not be issued to the person less than fourteen years of age.
3. (a) The court shall waive any civil fine for which a person who violates the provisions of this section would be liable if such person supplies the court with proof that between the date of violation and the appearance date for such violation such person purchased or rented a helmet.
(b) The court may waive any civil fine for which a person who violates the provisions of the section would be liable if the court finds that due to reasons of economic hardship such person was unable to purchase a helmet.
4. The failure of any person to comply with the provisions of this section shall not constitute contributory negligence or assumption of risk, and shall not in any way bar, preclude or foreclose an action for personal injury or wrongful death by or on behalf of such person, nor in any way diminish or reduce the damages recoverable in any such action.
NYS DEC Trail Rules and Regulations
Excerpts from Section 190.8 of Title 6 of the official compilation of Codes, Rules and Regulations of the State of New York for full text see: https://govt.westlaw.com/nycrr/Document/I21ee87ebc22211ddb7c8fb397c5bd26b?transitionType=Default&conte xtData=(sc.Default)
Subdivision (n) provides for use of state owned lands by horses and equestrians as follows:
(n) The riding, driving or leading of horses will be permitted anywhere on state lands under the jurisdiction of the Department of Environmental Conservation unless otherwise prohibited by law, regulation, posted notice or this subdivision. No person shall ride or permit a horse on:
(1) land devoted to intensively developed facilities, such as boat launch sites, day use areas, campgrounds*, ski centers education centers, fish hatcheries, game farms or headquarter complexes, and lands managed for public safety, such as flood control levees;
(2) foot trails, except where such trails are part of a publicly maintained road, or are specifically designated to allow travel by horses thereon; and
(3) designated snowmobile trails and cross-country ski trails that are covered with ice or snow. *Does not include camping areas specifically developed for horse use.
——————————————————————–
General Rules for Horseback Riding on DEC Land
Source:https://www.dec.ny.gov/outdoor/101037.html#General_Rules
- Proof of current negative Coggins certificate is required for all horses
- Out-of-state horse owners will be required to produce a 30-day health certificate
- Horse & health papers must be carried with them at all times
- Horseback riding is restricted to multiple use trails and designated horse trails
- Groups of 20 or more require a permit from the local Forest Ranger
- No person shall ride or allow a horse on: -Land devoted to intensively developed facilities, such as boat launch sites, day use areas, campsites, ski centers, education centers, fish hatcheries, game farms or headquarters complexes, and lands managed for public safety, such as flood control levees; -Foot trails, except where such trails are part of a publicly maintained road, or are specifically designated to allow travel by horses thereon; and Designated snowmobile trails and cross-country ski trails that are covered with ice or snow.
etiquette
Use of Public and Private Land
Respect the rules and regulations which apply to the use of public lands and always seek permission before crossing private lands.
- Don’t litter! If you carry it in carry it out!
•Keep camping, parking and corral areas clean. Leave them as you would like to find them.
•Park trailers and vehicle in spaces provided. Do not block roadways and trail entrances.
•Stay on designated trails. Do not cause unnecessary damage by trampling trailside vegetation.
•Respect other trail users. Do not force hikers off the trail!
•Do not tether horses to live trees.
•Do not smoke on the trail smoke only at rest stops or in camp.
•Drown any campfires, then stir and drown again.
Horse Manure
Consideration is key: Please clean up horse manure that is left by in the parking lots at the areas where you ride. Hunters, hikers, bus loads of students and/or senior citizens park in those lots and bristle at stepping in manure when they get out of their cars.
first aid
Emergency First Aid Kit
US Rider suggested emergency kit to help you handle most situations.
Source: Neva Kittrell Scheve & Dr. James Hamilton, DMV, http://www.usrider.org/article/emergency-aid-kit-100
•Roll Cotton – 2 rolls
•Roll Gauze – 4 rolls
•Gauze Squares
•Clean Standing Bandages – 2 quilt or fleece with outer wraps
•Adhesive Tape
•24″ Section Of #39; Pvc Pipe – which has been split in half lengthwise – for splinting: (check that diameter of pipe fits your horse) •Cohesive Flexible Bandage – 2 Vetratp® – Co-Flex®
•Sticky Roll Bandage – Elastikon®
•Thermometer
•Stethoscope
•Mosquito Forceps
•Scissors
•Twitch
• Antiseptic Soap – Betadine®
•Hydrogen Peroxide
•Antibacterial Ointment
•Antibacterial Spray Powder
•Ophthalmic Ointment
•Saline Eye Wash
•Butazolidin Paste
•Banamine Granules Or Paste
•Bucket
•Water 10 gallons or more Discuss this list with your own veterinarian, he/she may have other suggestions that are appropriate for you and your situation.
Encountering an Emergency
Source: theHorse.com ‘Most horse problems fall into two basic categories: traumatic and digestive, of which dehydration/heat exhaustion, colic, and major cuts with blood loss are a part," states Neva Kittrell Scheve, co-author with James Hamilton, DVM, of Equine Emergencies on the Road. If the injury appears to be life-threatening, and you don’t have numbers of veterinarians in the areas in which you’re traveling, call 911 and ask to be connected to a local equine veterinarian. If at all possible, refrain from unloading until the doctor arrives, especially if the horse is frightened or becomes aggressive”, she concludes. (USRider provides its members with on-the-road emergency vet referrals through its nationwide DVM directory.) But in order to know whether a situation is life-threatening, you first need to learn how to monitor your horse’s vital signs. In fact, you should take down all your horse’s baseline measurements ahead of time, regardless of the length of the trip you’re planning.
Here are the normal ranges for an adult horse:
* Pulse: 30-42 beats per minute;
* Respiratory rate: 12-20 breaths per minute;
* Rectal temperature: 99.5-101.5° F (a veterinarian should be contacted for a reading over 102.5° F);
* Capillary refill time: two seconds (the time it takes for the gum tissue to return to normal after having been pressed with a finger)
Other signs to check are:
* Skin pliability for evidence of dehydration. Failure of skin (usually tested on the neck) to return to normal after having been pinched indicates dehydration.
* Color of the mucous membranes of the gums, nostrils, inner eye tissue, and inner lips of the vulva should be pink. Any other color, from bright red to pale pink, and from white to bluish or purple, could indicate a serious problem.
* Color, consistency, and volume of manure should be normal.
* Signs of distress, anxiety, or discomfort, and absence of gut sounds are indications of problems.
* Lethargy, depression, and not eating or drinking are also indicators of problems.
* Evidence of lameness could include head bobbing, difficulty moving, odd stance, pain, or unwillingness to rise.
Precautions “Many problems can be prevented by taking the appropriate precautions, counsels Scheve, such as keeping your horse calm and comfortable, and providing him with a continuous supply of water. A horse that is under stress often times won’t drink, leading him to become dehydrated and susceptible to colic, heat exhaustion, and shipping fever.”
Dehydration/Heat Exhaustion Signs that your horse might be suffering from dehydration or heat exhaustion include increased body temperature and excessive perspiration, followed by increased respiratory rate and, in its most severe stages, weakness and lack of coordination. If you notice these signs, take your horse’s temperature, heart (pulse), and respiratory rates, do the skin-pinch test, and check capillary refill time. Contact a veterinarian immediately. Intravenous fluids and electrolytes will need to be administered. In the meantime, douse your horse with cold water or alcohol and water. “Horse owners who carry tranquilizers may be tempted to use acepromazine; do not!” underscores Scheve. “This drug, along with most other tranquilizers/sedatives, lowers blood pressure, which could prove devastating to a heat-stressed horse.” To help prevent this problem, you can give electrolytes, drive at night during hot weather, and stop regularly to allow your horse to drink, especially if he won’t drink while traveling. Chances are, he will drink if you take him off the trailer to relax. It is vital for your horse to drink water on a long trip, even in cold weather. “If your horse is going to be faced with the further stress of competition, make sure that he is well-hydrated before competing, and again before the return trip home,” Scheve advises.
Colic You need to recognize the early signs of colic, which include pawing, increased respiratory rate, lip flipping, and looking at his sides. Noticing these early will be beneficial in getting help before the problem becomes too severe. Schedule stops along the way to monitor your horse’s behavior. A veterinarian should always be called if colic is suspected. If your horse is also overheated, offer him a drink, a bath with cold water or a mixture of isopropyl alcohol and water, and walk him to lower his stress level. These measures could possibly help his gut motility return to normal. “Again, you should have discussed the medications you need to have on hand, and under what circumstances they might be used, with your veterinarian before your trip,” Scheve states.
Major Cut With Blood Loss Apply steady pressure with a clean bandage or towel for at least five minutes. Or, you can take a stack of 4 by 4- inch gauze squares and put them directly over the wound, hold them in place by wrapping with your roll gauze, and firmly apply a quilt and outer wrap (standing bandage) over the top. If the wound location prevents the use of roll gauze and outer bandage, then use a tapelike bandage (e.g., ELASTIKON). If blood is spurting from the wound before pressure is applied, or if after several minutes the blood is soaking through the pressure bandage, call your veterinarian. Once the bleeding has subsided, the wound needs to be cleaned; wash it with a continuous flow of water to flush out any dirt and debris and use a clean, wet cloth for facial wounds. If the skin edges are separated, the wound might require sutures. Do not remove the bandage to clean if the bleeding is severe enough for you to have called a vet; just wait for his or her arrival. Do not apply antiseptics, detergents, creams, or powders, as they interfere with healing. A mild antibiotic ointment can be applied to prevent desiccation (drying out).
camping with horses
Camping With Horses
Happy Camper
Tips for making overnight trips with your horse easy, fun, and safe using a portable pen.
Excerpted from a June 2000 Practical Horseman magazine article by Sandra Cooke
A lightweight, portable pen, or corral designed to stow on or in your trailer and to set up with a minimum of fuss at a campground or trailhead opens a whole new world of enjoyment with your horse. Whether you choose an electric pen or a portable panels it will work best when you train your horse to accept his pen as his home away from home before you hit the road, and make this first camping trip (and yours!) as stress-free as possible.
Introducing the Idea Camping is new for your horse, so introduce it a step at a time. (And before you even start, consider: Laid-back, people-oriented horses make the best campers. If your guy’s a high-anxiety, reactive type who frets about every change and hates leaving home and his regular buddies for any reason, camping may not be a good career move for him.)
If you plan to use an electric pan, does your horse know about electric fencing? If not, set up your first at-home practice pen inside a paddock or riding ring for extra security, and make it extra large (about 20 feet square). That way, the first time he touches the fence, he’ll have room to react without inadvertently backing into the other side. Use 3 to 4 foot posts and at least two courses of tape or wire (three is even better) so he feels securely enclosed. Even if you use wide electric tap, flag the fence generously. You want him to see it, be curious about it, and touch it on his own. (you don’t want to lead him to the fence and persuade him to touch it because he might think that your actions, not his, caused the zap.) Make sure the charger is on; then lead him inside the pen to the center, unsnap the lead shank, and leave him there as you exit and close the gate behind you. But stay well within sight and sound to give him confidence. He’ll probably approach, touch the fence with his nose, and jump back from the sensation. Most horses think things over, touch the fence a second time, and respect it thereafter. If yours seems to accept the fence quietly after a few minutes, go back into the pen and give him a treat, and lead him out. Repeat this several times over a couple weeks to make sure he remembers and respects the fence.
Is your horse accustomed to confinement in a small area? Many portable pens are only 12 to 16 feet square, both because space available for campers may be limited and because smaller pens are safer. If your horse lives out in a field with a run-in shed and especially if he’s part of a herd, teach him to spend time on his own in a small space. Set up your panels or electric pen just outside his field, where he can see his buddies and even touch noses with them over the fence. Put his water, grain and hay in the pen, and keep an eye on him to make sure he’s not getting upset. Begin by leaving him there an hour or so; increase the time as he gets used to it. (If he spends part of each day in a box stall, he may find the confines of a portable pen more familiar.)
Face overnight camping at home or at the barn where you keep your horse. Try to enlist an equine camping buddy for company, or locate your “campsite” near a paddock where other horses are turned out at night. Set up your horse’s pen near your trailer, make him comfortable, retire to your tent or camper and spy on him regularly during the night. (If you’ve arranged for buddy, put their pens close together.) If he cleans up his hay and (better yet) lies down to sleep, he’s go the idea.
Connect with an experienced camper for your early trips. No only will you learn the details of fun and safety from another horse person who’s “been there/done that”, but your horse will pick up on the attitude of a veteran equine camper.
More Happy Camping Tips. For electric pens, space posts no more than 6 feet apart to keep tape or wire from sagging. (Space posts even closer on either side of gate opening.) Use tall posts (3 feet or more) with tape or wire strung near the top to discourage leaning. A second, lower course of tape or wire provides extra security.
- Although many horses camp happily in a 12 foot square pen, make electric pens more generous (14 x 16 feet or so) whenever possible to lessen the chances of an accidental zap when your horse rolls or lies down. (Don’t go bigger than that, though. If your horse gets excited, too much space gives him the opportunity to build up dangerous momentum.)
- Bring plenty of hay. Even at grassy sites, grazing inside a pen disappeears quickly, tempting your horse to lean over the fence.
- When setting up a panel pen, leave your horse inside the trailer so the sight and sound won’t rattle him.
- Avoid using your trailer as one side of the pen. Your hourse can injure himself rubbing on or bumping into an unprotected edge of metal (and if that edge is there, he’ll find it!)
- If you’re with a large group, set up your horse’s pen where he can see as many of his fellow campers as possible. He’ll feel more secure than he will if he can hear but not see them.
-
-
trail riding
Riding in a Group
Basic Rules When Riding in Groups
Source: https://www.thesprucepets.com/tips-for-safe-horseback-riding-1886886
•Wear an ASTM approved riding helmet.
•Consider wearing torso protecting safety vest.
•Keep at least one horse length between horses.
•If your horse becomes very agitated, dismount and handle the situation from the ground.
•Don’t race.
•Ride the speed and to the capabilities of the least experienced rider of the greenest horse
•Check your girth before mounting and tack frequently for signs of wear and weakness.
•Learn to do an emergency (one rein) stop.
•Learn how to fall – you may avoid injury by rolling away from the horse.
•Learn to do an emergency dismount.
•Wear sturdy boots with minimal tread and a 1 inch (2.5 cm) heel.
•Always ride in complete control – the faster you go the faster things can go wrong.
•Carry a cell phone or two-way radio.
•Avoid riding along roads where cars and other vehicles may spook your horse.
Trail-Riding Essentials
Have What You Need When You Need It Source: Sandra Cooke on EquiSearch.com
• Extra layers of clothing. Include a lightweight wind-and water-resistant pullover, for changes in weather.
• Bandanna. “A bandanna is over my ears in cold weather, around my neck in hot weather. It’s an emergency compress, or a hanky. It repairs equipment, or ties stuff to my saddle,” says Lori.
• Gloves. Use to keep your hands warm, protect your hands when handling rocks, branches, brush, and wire.
• Fanny pack. Find one that fits close to your body without bouncing. Inside it, stash the items you want to stay with you if you and your horse part company, including:
–Cell phone, to call for help, or to phone home.
–Pocket knife or multipurpose tool.
–Whistle, more audible than a yell for getting help.
–Flashlight, for dealing with emergencies in the dark, finding your way, and helping others to find you.
–Large plastic trash bag (fold small and secure with a rubber band) for emergency poncho, ground cloth, or tablecloth.
–Purse-size pack of facial tissues.
–Juice box or other packaged drink. –Durable concentrated energy food: PowerBar or Clif Bar or Payday candy bar. Avoid ones that melt or crumble
–Sunblock.
–Lip balm with UV protection.
–Small tube of petroleum jelly or Desitin to treat minor abrasions or chafing.
–Topographical map or good road map of the area where you plan to ride. Get your horse used to your unfolding it at home, on the ground, and then (cautiously) on horseback.
• Water bottle(s).
* Cantle bag that can attach to your saddle. In your cantle bag, stow:
–Easyboot to keep the small problem of a lost shoe from becoming the big problem of a damaged foot.
–Hoof pick.
–Small roll of duct tape for emergency repairs or reinforcing Easy Boot.
–Reflective vest for safety if you’re caught out after dark; rolls up.
–Roll of reflective tape for hock- and tail-wrapping after dark.
–Extra bandanna.
–Roll of bandaging tape, such as Vetrap, for emergency care.
–Extra-long leather bootlaces for repairing tack or tying objects to saddle.
–Inexpensive stethoscope for checking pulse and gut sounds.
–Spray bottle of water/alcohol or water/witch-hazel mix to cool your horse; seal in Ziploc bag to avoid leaks.
–First-aid kit including bandages, antibacterial cream, etc.
hunting season
Safety During Hunting Season
Excerpted from Hunting Season Horse Safety Tips Dr’s. Foster & Smith Educational Staff https://www.drsfostersmith.com/pic/article.cfm?aid=2009
It’s best to avoid trail riding during hunting season, especially during the opening weekend. If you feel safe enough in your area to hit the trails, take these steps to help keep you safe.
•Wear bright clothing and avoid earth tones; white or any color a hunter might mistake for a wild animal
•Wear a blaze orange vest or jacket while riding
•Avoid riding on public lands during hunting season
•Braid some colorful ribbon (or strips of Vetrap) into your horse’s tail
•Put vivid bandaging or Vetrap on the bottom of your horse’s legs – you can even wrap pieces onto the bridle where it won’t interfere with your horse’s vision also see: https://thehorse.com/124961/safety-for-horses-during-hunting-season/https://horseandrider.com/trail-riding/hunting-season-safety-guide-15555
trail riding safety
Get Used to Night Riding
Get your horse used to flashlights and headlamp beams before you go: Source: https://horseandrider.com/health-and-advice/eqnightrid637-12993
•At dusk, tack up your horse. At this time of day, the flashlight won’t seem as bright. Hand-walk him to a small, enclosed area, such as a round pen for better control.
•With your reins in one hand and a flashlight in the other, stand at your horse’s front legs, facing him. Talk to him in soothing, reassuring tones. Point the flashlight at his hooves and turn it on. Run the beam over his hooves, then slowly up his legs, as though you were giving him a bath for the first time. Act blas?, so you don’t transmit any nervousness to him.
•”Bathe” the rest of your horse’s body with light, until he’s completely desensitized.
•Turn off the flashlight, mount up, and sit quietly. Point the flashlight straight down, and turn it on. Slowly move the beam around until it ceases to distract your horse. Then pick up a jog, and continue to move the beam. Then try it at a lope, gradually moving the beam more quickly. Your goal is to teach your horse to ignore an erratic light beam-even at a lope.
•When your horse is comfortable with the flashlight at dusk, repeat the drill in darkness, so he’ll get used to a brighter light.
“ICE” (In Case of Emergency)
Enter “ICE” contact information in your cell phone
“ICE” is an international designation emergency responders look for on cell phones to find emergency contact information if an injured person is unable to speak. Enter emergency info for both you (ICE) and your horse (ICE HORSE) in your cell phone.
Enter the word ICE then list the name and phone number of the person to call in case you are found injured.
If you want to have more than one emergency contact use successive entries such as “ICE 2,” “ICE 3.” Using the entry “ICE HORSE,” “ICE HORSE 2” etc., do the same with the name and phone number of your vet along with the person to be contacted to make decisions about your horse(s
Trail Riding at Night
Increase Your Safety When Trail Riding at Night Source: https://www.thesprucepets.com/tips-for-horseback-trail-riding-at-night-1887057
Carry a flashlight Stick to known trails.
Wear clip on LED lights Avoid riding on roadsides – bright headlights can be blinding and upsetting for horses
Wear brightly colored and reflective clothing walk at a faster pace, hazards such as bad footing can come up faster and low tree branches may not be visible. Stay in the open where the light is best.
Don’t ride alone and stay together
Trail Safety
Safety Tips From the NYS DEC
• Do not ride alone. Have at least two adults in party.
• Always let someone know exactly where you plan to travel & when you expect to get back.
• Then carry out that schedule.
• Carry first aid supplies for rider and mount.
• Carry a supply of rawhide lacing for emergency repairs to reins, girth, etc.
• Halter should be worn under the bridle to tether horse.
• Carry fly spray and fly dope (during fly time) for horse and rider.
• Take along an extra horseshoe and nails, hatchet, jackknife with leather pouch.
• Carry a coil of 1/2″ rope.
travel
NYS Thruway Road Conditions
1-800-847-8929 1630AM
Pre-Trip Checklist
Source: http://www.usrider.org/article/pretrip-checklist-horse-trailers-27825-6
•Wheel bearings serviced? (service every 12 mos./12,000 miles, carry spare bearing set).
•Tires in good condition? (look for dry rot, replace every 3-5 years regardless of mileage).
•Check tire pressure (including spares and inside tire on dual wheels).
•Hitch locked on the ball? Correct size ball?
•Safety cables/chains connected?
•Plug and secure electrical connection.
•Connect emergency breakaway system.
•Emergency battery charged?
•Test trailer lighting (brakes, turn signals, running, perimeter).
•Check/test brake controller.
•Prior to loading horse(s), check trailer for hazards.
•Leg wraps, head bumper on horse(s)?
•Headlights on? For greater safety – get noticed.
•Drive safely – allow greater braking distance, and travel at generally slower speeds.
Trailer Maintenance
Tips to prepare your trailer for the upcoming travel season:
• Remove and inspect all wheels and hubs or brake drums.
• Inspect suspension for wear.
• Check tightness of hanger bolt, shackle bolt, and U-bolt nuts per recommended torque values.
• Check brake linings, brake drums, and armature faces for excessive wear or scoring.
• Check brake magnets with an ohmmeter. The magnets should check 3.2 ohms. If shorted or worn excessively, replace.
• Lubricate all brake moving parts, using a high temperature brake lubricant.
• Remove any rust from braking surface and armature surface of drums.
• Inspect oil or grease seals for wear or nicks. Replace if necessary.
• Inspect and grease wheel bearings.
• Check all trailer tires, (including spares) for signs of dry rot, faulty air valves, uneven tire wear and damage.
• Check tire pressure before each trip.
• Service the wheel bearings every 12,000 miles or annually regardless of mileage
•If the trailer has been sitting for a while, check for wasp nests, spider webs, and any other creatures For additional safety tips, visit the Equine Travel Safety Area on the USRider Web site
Trip Essentials
Source http://www.usrider.org/article/dont-road-27815-3 Don’t leave home without these
• Spare Tire(s)
• Hydraulic Jack – rated to jack your trailer while loaded
• Lug Wrench
• Three (3) emergency triangles (preferred) or flares
• Chocks
• Flashlight
• Electrical tape
• Duct Tape
• Equine First Aid Kit with splint (know how to use it)
• Knife for cutting ropes, etc., in emergency
• Water and Water Hose
• Buckets/sponge
• Spare halter and lead rope for each Horse
• Spare bulbs for exterior and interior lights
• Spare fuses if applicable
• Fire extinguisher with up to date charge
• WD-40 or other lubricant
• Broom, shovel, fork, and manure disposal bags
• Insect spray (bee and wasp)
• Registration for the vehicle and trailer
• Proof of insurance
• Jumper cables
• Tool kit including wiring materials
• Work gloves

